Ah, spring. Birds chirping, flowers sprouting, and warm sunny days!
Unless you’re in Edmonton.

Via Meanwhile in Canada.
Growing up I spent many hours watching the same television shows my parents enjoyed watching. One of my favourite shows was “Northern Exposure“, a comedy highlighting the culture shock experienced by a big-city doctor when he is assigned to small-town Alaska. One of the many differences highlighted in the show was the need for the doctor and funeral home director to predict how many people would die over the course of the long winter, to ensure that enough graves were dug before the ground froze.
As morbid as this metaphor seems, I take a similar approach when building canvas stretchers for my paintings.
The workshop where I build canvas stretchers for my paintings is out in my garage. It’s really the only place for it, because once you get sawdust in the house, it’s never ever going away. I also have to take the needs of a napping toddler into consideration. Everything I need for stretcher-building is kept out there: Wood, nails, glue, square, etc.
Generally, I try to stock up on built stretchers before winter, mostly because I don’t want to be operating any power tools with frozen fingers. If I happen to run out of canvas stretchers, I’ll resort to starting paintings on unstretched canvas.
But inevitably comes the time where I NEED to build more stretchers, even if the city I live in just got hit by a rather large spring snowstorm. So when my husband took the wee one out for the day this past Saturday, I jumped at the chance for some uninterrupted building time. I present to you:
How a Stay-at-home Mom/Artist builds a canvas stretcher in the winter Edmonton spring:
1. Get out of bed. Changing out of your PJs is optional, depending on the warmth of said PJs.
2. Get caffeinated. One or two cups of coffee should do it. Take this time to have some breakfast too, if you’d like.
3. Slip on your shoes and coat. Run out to the garage and grab the wood required for the stretchers you are building. Bring it inside to your basement studio. Try not to slip and fall down the stairs. Let your fingers defrost.
4. Basic Measurements and Assembly: Figuring out where you’re going to cut the wood once you bring it back out to the garage.
5. Haul the wood back outside. Cut the wood, not your frozen fingers.
6. Take two trips to bring the cut pieces back to your studio. Let your fingers and your toes defrost.
7. Take another trip out to the garage to grab the nails and staples you need.
8. Take one more trip for the wood glue you forgot.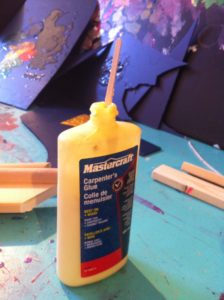
9. Realize your wood glue is frozen solid. Dig through boxes of old supplies from school to find more.
10. Discover 8-year-old bottle is glued shut. Proceed to pry it open. Use wooden coffee stir sticks to apply said glue to stretchers.
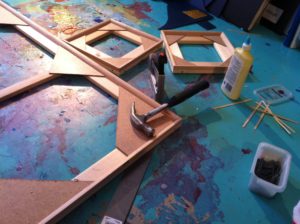
11. Begin assembly.
12. Pause assembly when toddler arrives home with husband, and needs to nap. Take this opportunity to nap yourself.
13. Mop stairs where you trailed snow and mud before someone breaks their neck.
14. Complete assembly when toddler awakens. Wait 24 hours for the glue to dry before stretching canvas onto your new stretchers.
15. Start dinner.
At the end of my super-productive day I ended up with one large stretcher for a commission, and two teeny-tiny stretchers for the Art Gallery of St. Albert’s Square One fundraiser.
Next Step: Finding time to stretch my canvas.
Done!
As always your blog updates are the best.